
From Excel to enterprise: The asset onboarding workflow that scales

Dhananjay Chandra Kulal
Author
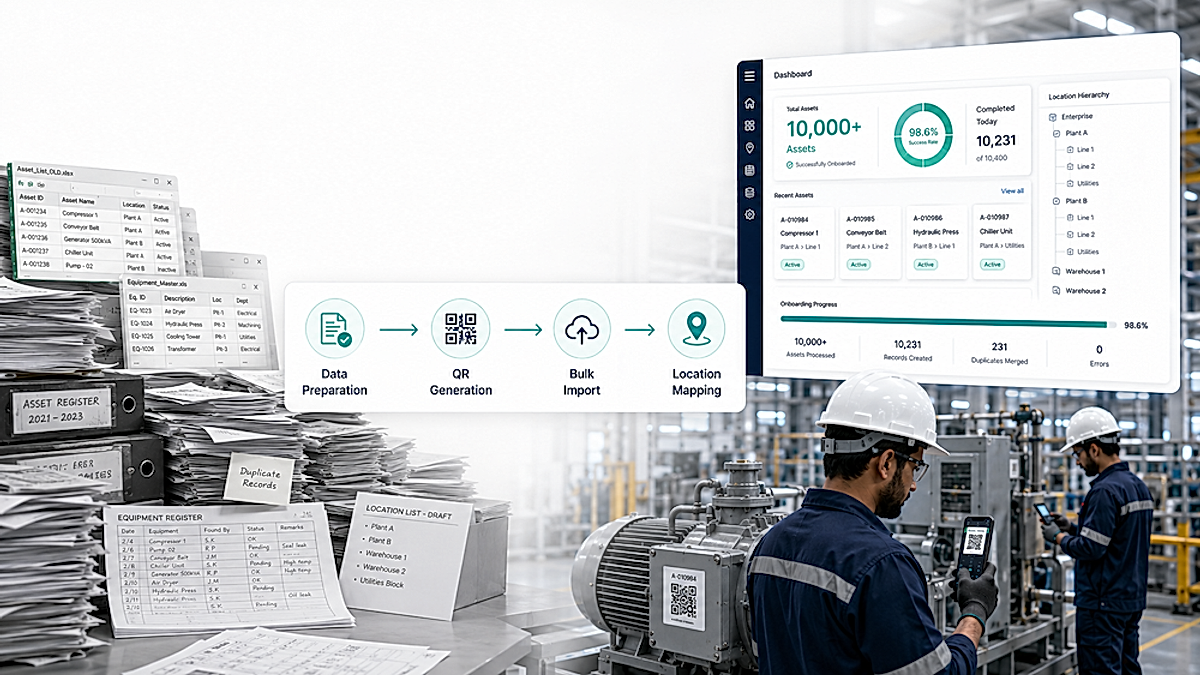
A maintenance head at a multi-site manufacturing company once described his asset register as "mostly accurate." On paper, the organization managed around 10,000 assets spread across three plants. In reality, nobody could confidently answer how many assets actually existed, where they were located, who owned them, or which ones required maintenance. Procurement maintained one spreadsheet, finance another, maintenance had its own records, and individual departments relied on local Excel files that had evolved over years.
The organization wasn't struggling because it lacked software. It was struggling because it lacked a repeatable asset onboarding workflow.
Large-scale asset onboarding is not a data import exercise. It is an operational process that creates a trusted digital foundation for every maintenance activity, audit, inspection, and lifecycle decision that follows.
The speed of onboarding thousands of assets depends far less on the technology than on the workflow used to prepare, structure, and verify the data. Whether you're onboarding manufacturing equipment, biomedical devices, warehouse infrastructure, government assets, or utility equipment, the same four-step process consistently delivers accurate results at enterprise scale.
Why large-scale asset onboarding becomes an operational problem
Most organizations assume onboarding thousands of assets is simply a matter of importing a spreadsheet into an asset management platform. The spreadsheet is rarely the problem. The problem is that every department has a different version of the truth. Procurement records include purchase details but lack maintenance information. Finance tracks depreciation but not asset location. Operations know where equipment is physically installed but rarely maintain standardized records. Maintenance teams often maintain their own asset lists with naming conventions that differ from every other department.
By the time an implementation begins, there may already be hundreds—or thousands—of duplicate records, inconsistent names, retired equipment that still exists on paper, and active assets that were never formally registered. These inconsistencies create operational challenges long after onboarding is complete. Maintenance schedules fail because assets are duplicated. Auditors cannot reconcile physical assets with digital records. Teams spend more time verifying information than acting on it.
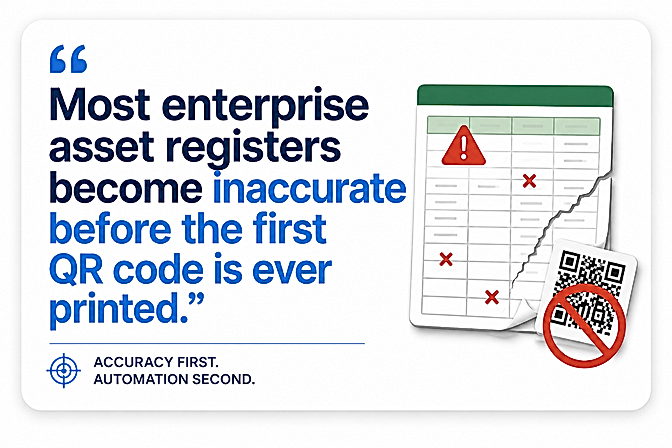
Large-scale onboarding succeeds when organizations treat the asset register as operational infrastructure rather than an administrative spreadsheet.
The objective is not to onboard assets. It is to create a trusted asset register.
An asset register is only valuable if operational teams trust it. If maintenance engineers continue walking the plant to verify equipment because they cannot trust the system, the implementation has already failed. The goal of onboarding is therefore much broader than importing data. Every asset should have a unique identity, an accountable owner, a verified location, complete lifecycle information, and the operational context needed to support maintenance, compliance, and decision-making.
This is why successful organizations separate onboarding into four distinct stages. Rather than creating asset records while technicians walk through facilities, they prepare the data first, generate digital identities, import structured information, and then validate everything on the ground. The result is a reliable asset register that becomes the foundation for maintenance planning, compliance, inspections, calibration, and operational visibility.
The four-step workflow for onboarding 10,000 assets
Large-scale deployments consistently follow four operational stages. Each stage builds on the previous one, reducing manual effort while improving accuracy.
Step 1: Prepare the asset data before touching the platform
The first stage determines the success of the entire deployment. Instead of importing raw spreadsheets from multiple departments, consolidate them into a single standardized asset master. This becomes the authoritative source of truth before any QR codes are generated or assets are imported. The objective is to ensure every asset record contains the operational information required throughout its lifecycle.
Data field - Why it matters during onboarding?
- Unique Asset ID Creates a permanent identity for every asset and prevents duplicate records.
- Asset Name & Category Standardizes naming across plants, departments, and maintenance teams.
- Plant, Building & Location Places every asset within a structured location hierarchy for faster retrieval and inspections.
- Department & Asset Owner Establishes accountability and clearly defines operational responsibility.
- Manufacturer, Model & Serial Number Connects the asset to warranties, service history, and OEM documentation.
- Purchase & Installation Date Supports lifecycle planning, depreciation, and maintenance scheduling.
- Warranty & AMC Details Identifies service coverage before maintenance activities begin.
- Maintenance & Calibration Requirements Enables preventive maintenance plans and compliance workflows from day one.
- Criticality Level Helps prioritize business-critical equipment for maintenance and monitoring.
- Supporting Documents Links manuals, certificates, inspection reports, warranties, and SOPs to every asset.
Before importing the data, remove duplicate records, standardize naming conventions, verify the physical existence of every asset, define a consistent location hierarchy, and assign ownership.
This preparation stage often eliminates most onboarding errors before deployment even begins.
Step 2: Generate QR codes before field deployment
Once the asset master is complete, generate unique QR codes for every verified asset.
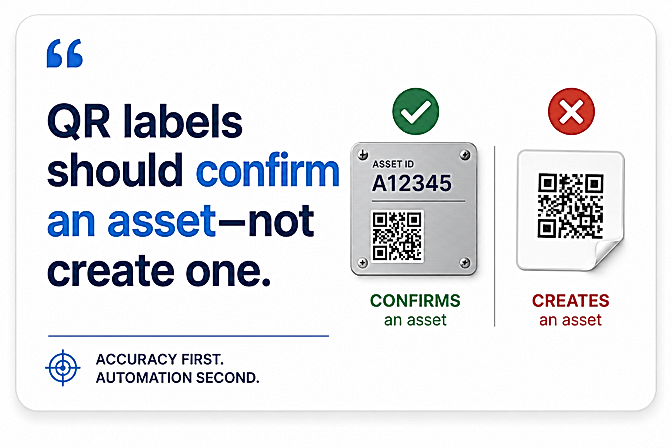
A QR code should never be used to create an asset. It should represent an asset that already exists within the system.
Each label becomes the physical identifier of a digital record and typically includes:
- Asset ID
- Asset name
- QR code
- Department or plant
- Optional company branding
Printing labels before field deployment ensures technicians spend their time verifying information rather than entering it manually. During physical tagging, the technician simply scans the label, confirms the asset, and validates the existing record. This approach significantly reduces inconsistent naming, duplicate entries, and manual typing errors.
Step 3: Bulk import the complete asset register
After data preparation and QR generation, import the complete asset register into the platform using bulk upload tools. Instead of onboarding one asset at a time, organizations can create thousands of operational records within minutes.
A successful import typically includes:
- Asset hierarchy
- Parent-child relationships
- Departments
- Cost centres
- Ownership records
- Warranty information
- Vendor details
- Maintenance schedules
- Calibration requirements
- Asset categories
- Supporting documents
- Operational status
At this stage, every asset already exists digitally before technicians begin field verification. This dramatically reduces deployment time because field teams focus only on validating records rather than building them.
Modern enterprise asset platforms also allow future integrations with ERP systems, maintenance workflows, calibration schedules, and document repositories, ensuring that the asset register becomes the operational foundation for connected processes rather than an isolated inventory.
Step 4: Validate every asset in its operational location
The final stage connects digital records with physical reality.Technicians move through each facility, scanning QR labels and confirming that every asset matches its digital profile.
Typical validation activities include:
- Confirming QR labels are correctly attached
- Verifying operational location
- Confirming department ownership
- Updating operational status
- Capturing equipment photographs
- Recording GPS or indoor location where applicable
- Identifying missing or retired equipment
Most enterprise deployments organise locations using a structured hierarchy:
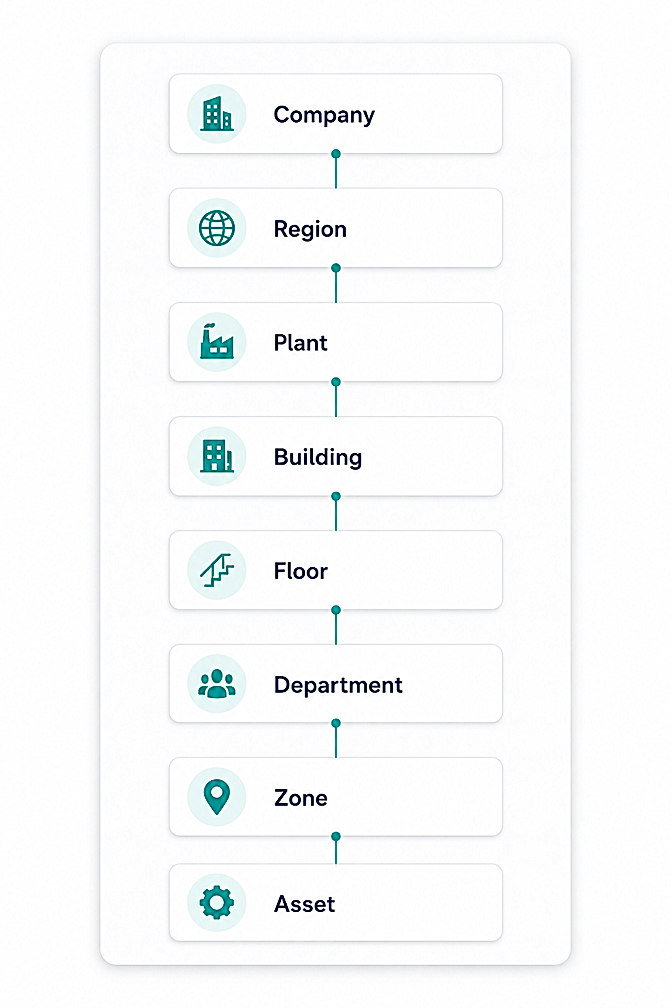
This hierarchy enables maintenance teams, auditors, and operations managers to locate equipment quickly while supporting future asset movement, inspections, and lifecycle tracking. Once field validation is complete, the organisation has its first verified digital asset register.
Common onboarding mistakes that slow enterprise deployments
Large onboarding projects rarely fail because of technology. They fail because operational shortcuts introduce long-term data quality problems. One of the most common mistakes is importing raw spreadsheets directly into the platform. Duplicate records become duplicate maintenance histories, duplicate work orders, and duplicate audit evidence.
Another frequent issue is generating QR codes before cleaning asset data. Once incorrect labels are attached to physical equipment, correcting them becomes a manual exercise across every affected site.
Many organisations also postpone ownership assignment, assuming it can be completed later. Assets without accountable owners quickly become invisible during day-to-day operations, creating confusion whenever maintenance or inspections are required. Location structure is another overlooked area. Flat location lists may work for small facilities but become unmanageable across multiple buildings, production lines, warehouses, or campuses. A structured hierarchy improves navigation, reporting, and operational control.
Finally, allowing technicians to create assets manually during deployment almost always introduces inconsistent naming conventions and duplicate records. Field teams should validate existing information—not build it from scratch.
A real enterprise onboarding scenario
A manufacturing organisation operating three production facilities planned to digitise approximately 10,000 production assets, utilities, tools, and quality equipment. Before implementation, asset information existed across six independent spreadsheets maintained by different departments. Equipment naming varied between plants, duplicate records were common, and maintenance schedules relied heavily on paper-based registers.
The deployment began with consolidating every asset into a single master dataset. Duplicate records were removed, naming standards were established, ownership was assigned, and locations were organised into a consistent hierarchy. QR labels were generated only after every asset record had been reviewed.
The complete asset register was then imported into the platform before field teams entered the production facilities. During deployment, technicians focused on attaching QR labels, confirming equipment details, validating locations, and capturing supporting photographs. Because the digital records already existed, physical verification became a confirmation exercise rather than a data-entry exercise.
Within a short deployment window, the organisation established a trusted digital asset register that immediately supported preventive maintenance planning, audit preparation, and operational reporting. Future inspections, work orders, calibration schedules, and asset movements all referenced the same verified source of truth, eliminating the inconsistencies that had accumulated over years of disconnected spreadsheets.
Downloadable asset onboarding template
A repeatable onboarding process starts with a repeatable template. Before beginning any deployment, create a standardized onboarding workbook that includes:
- Asset master data
- Location hierarchy
- Department ownership
- Asset categories
- Criticality ratings
- QR mapping fields
- Maintenance requirements
- Calibration schedules
- Warranty information
- Validation checklist
Using a consistent template reduces onboarding time, improves data quality, and makes future expansions significantly easier.
Final thoughts
Onboarding assets is not an exercise in speed. It is an exercise in operational discipline. Organizations that rush directly into QR tagging or bulk imports often spend months correcting inaccurate records. Those that invest time in preparing data, creating digital identities, importing structured information, and validating assets systematically establish a trusted operational foundation from day one. A well-designed asset onboarding workflow does more than populate an asset management platform. It creates the digital backbone for maintenance, compliance, inspections, audits, and lifecycle intelligence.
If your team is still piecing asset operations together with spreadsheets, WhatsApp groups, and paper registers, a structured onboarding workflow is the fastest way to build an asset register your operations team can trust.